This guide covers compiling the XR player sample Unity project for Android and configuring it with specific glTF content.
What you will build: a native Android application that loads glTF scenes with the MPEG glTF extensions, installed and running on an Android smartphone or tablet.
Prerequisites
- adb installed on the machine, and an Android device with developer options and USB debugging enabled and connected.
- Unity 3D 2022.3.34f1 with both the Android and iOS support modules installed (Android API 28 and NDK 27.2.12479018 are used).
- git LFS (required to clone the
rt-xr-contenttest content). - The native build tools used to compile the MAF library and media pipelines: Meson (the build system) and SWIG (used to generate the C# bindings). See the build steps below for how they are invoked.
This guide assumes a Windows environment with a git-bash terminal (eg. to run shell scripts); the same instructions apply to other platforms.
The tutorial covers the following steps:
- Clone the XR Player unity project
- Compile & install media pipeline library and plugins for Android
- Build and run the unity project
- Configure the XR player sample application
- Launch the player
Step 1: Clone the XR Unity Player project
rt-xr-unity-playerThe Unity project for the XR Player application.git clone --recursive https://github.com/5G-MAG/rt-xr-unity-player.git
Note: --recursive is required to get all submodules checked out.
Step 2: Build and install media pipelines
Clone and install the source code
rt-xr-maf-nativeC++ Media Access Function library (libmaf) and the avpipeline media pipeline plugin.git clone https://github.com/5G-MAG/rt-xr-maf-native.git
cd rt-xr-maf-native
Compile the MAF library and media pipeline plugins
This step builds libmaf (the C++ Media Access Function library used by the player), the avpipeline plugin (a media pipeline built on FFmpeg that decodes audio and video), and the C# bindings. The build uses Meson, and SWIG generates the C# bindings.
Compile and install dependencies
rt-common-sharedProvides the avcodec-build scripts used to compile the avpipeline (FFmpeg) dependencies.Clone rt-common-shared as a sibling directory to rt-xr-maf-native, then follow these instructions to compile the avpipeline dependencies. The avcodec-build produces the FFmpeg libraries that the copy commands below move into the project; if it has not been run, those cp commands will fail because the source files do not exist.
Copy the generated libraries into the avpipeline subproject:
mkdir -p ./rt-xr-maf-native/subprojects/avpipeline/external/avcodec/android/arm64-v8a/lib
cp ./rt-common-shared/avcodec-build/build/ffmpeg/aarch64/lib/*.so ./rt-xr-maf-native/subprojects/avpipeline/external/avcodec/android/arm64-v8a/lib

cp -r ./rt-common-shared/avcodec-build/build/ffmpeg/aarch64/include ./rt-xr-maf-native/subprojects/avpipeline/external/avcodec/android/arm64-v8a/include/

cp ./rt-common-shared/avcodec-build/build/ffmpeg/aarch64/LICENSE ./rt-xr-maf-native/subprojects/avpipeline/external/avcodec/android/arm64-v8a/LICENSE
Configure cross compilation configuration
- Download and install the Android NDK. The next steps assume a Windows x86_64 environment with the Android NDK 27.2.12479018 installed in
C:\Users\<your_user_name>\AppData\Local\Android\Sdk\ndk. - Locate the
./rt-xr-maf-native/crossfile/android-arm64-v8aand modify it to point to your local NDK installation, for instance:
[binaries]
ar = ['C:\Users\<your_user_name>\AppData\Local\Android\Sdk\ndk\27.2.12479018\toolchains\llvm\prebuilt\windows-x86_64\bin\llvm-ar']
c = ['C:\Users\<your_user_name>\AppData\Local\Android\Sdk\ndk\27.2.12479018\toolchains\llvm\prebuilt\windows-x86_64\bin\aarch64-linux-android28-clang.cmd']
cpp = ['C:\Users\<your_user_name>\AppData\Local\Android\Sdk\ndk\27.2.12479018\toolchains\llvm\prebuilt\windows-x86_64\bin\aarch64-linux-android28-clang++.cmd']
c_ld = ['C:\Users\<your_user_name>\AppData\Local\Android\Sdk\ndk\27.2.12479018\toolchains\llvm\prebuilt\windows-x86_64\bin\ld.lld']
cpp_ld = ['C:\Users\<your_user_name>\AppData\Local\Android\Sdk\ndk\27.2.12479018\toolchains\llvm\prebuilt\windows-x86_64\bin\ld.lld']
strip = ['C:\Users\<your_user_name>\AppData\Local\Android\Sdk\ndk\27.2.12479018\toolchains\llvm\prebuilt\windows-x86_64\bin\llvm-strip']
Configure and compile the MAF library and media pipeline plugins
libmafand C# bindings are enabled by default.- the
avpipelineplugin needs explicit configuration, theavcodec_dirmust point to a subdirectory of the project where platform specific dependencies have been copied:
cd rt-xr-maf-native
meson setup --wipe -Davpipeline=true -Davpipeline:avcodec_dir=external/avcodec/android/arm64-v8a build/android/arm64-v8a --cross-file crossfile/android-arm64-v8a
meson compile -C build/android/arm64-v8a
Install the media pipeline factory and plugins into the Unity project
Assuming rt-xr-unity-player repository has been cloned in a sibling directory ../rt-xr-unity-player, run the following commands with the correct path that applies to your installation:
export ANDROID_NDK_HOME='/c/Users/<your_user_name>/AppData/Local/Android/Sdk/ndk/27.2.12479018'
cd rt-xr-maf-native
scripts/install_android.sh ../rt-xr-unity-player/Packages/rt.xr.maf
The script copies the following:
- all compiled libraries from
rt-xr-maf-native/build/android/arm64-v8a/tort-xr-unity-player/Packages/rt.xr.maf/bin/android/arm64/ - C# bindings source code from
rt-xr-maf-native/subprojects/maf_csharp/swig/tort-xr-unity-player/Packages/rt.xr.maf/maf/swig/ - avpipeline dependencies from
rt-xr-maf-native/subprojects/avpipeline/external/avcodec/android/arm64-v8a/lib/tort-xr-unity-player/Packages/rt.xr.maf/dependencies/ffmpeg/7.1/android/arm64along with the related LICENSE - libc++ from
$ANDROID_NDK_HOME/toolchains/llvm/prebuilt/$ANDROID_NDK_HOSTNAME/sysroot/usr/lib/aarch64-linux-android/libc++_shared.sotort-xr-unity-player/Packages/rt.xr.maf/dependencies/libc++/android/arm64
Make sure all the *.so libraries are configured properly in the Unity Editor.
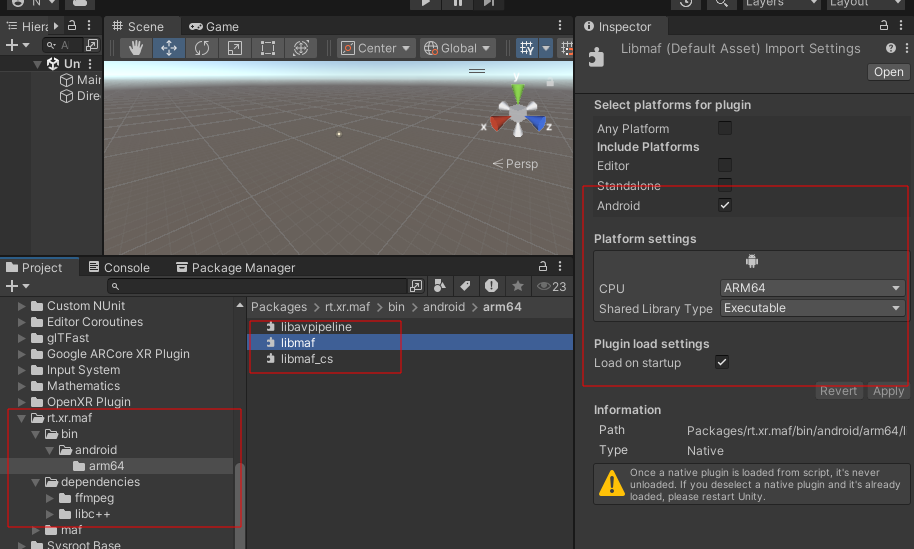
For each library, in the inspector panel:
- Android platform must be checked
- arm64 must be selected
The configuration is stored in Unity's *.meta sidecar files and are tracked in the Unity repository. Unity removes the *.meta files if the resource they reference is not found when opening a project.
Step 3: Build and run the Unity project
Open the rt-xr-unity-player directory as an existing project from Unity Hub.
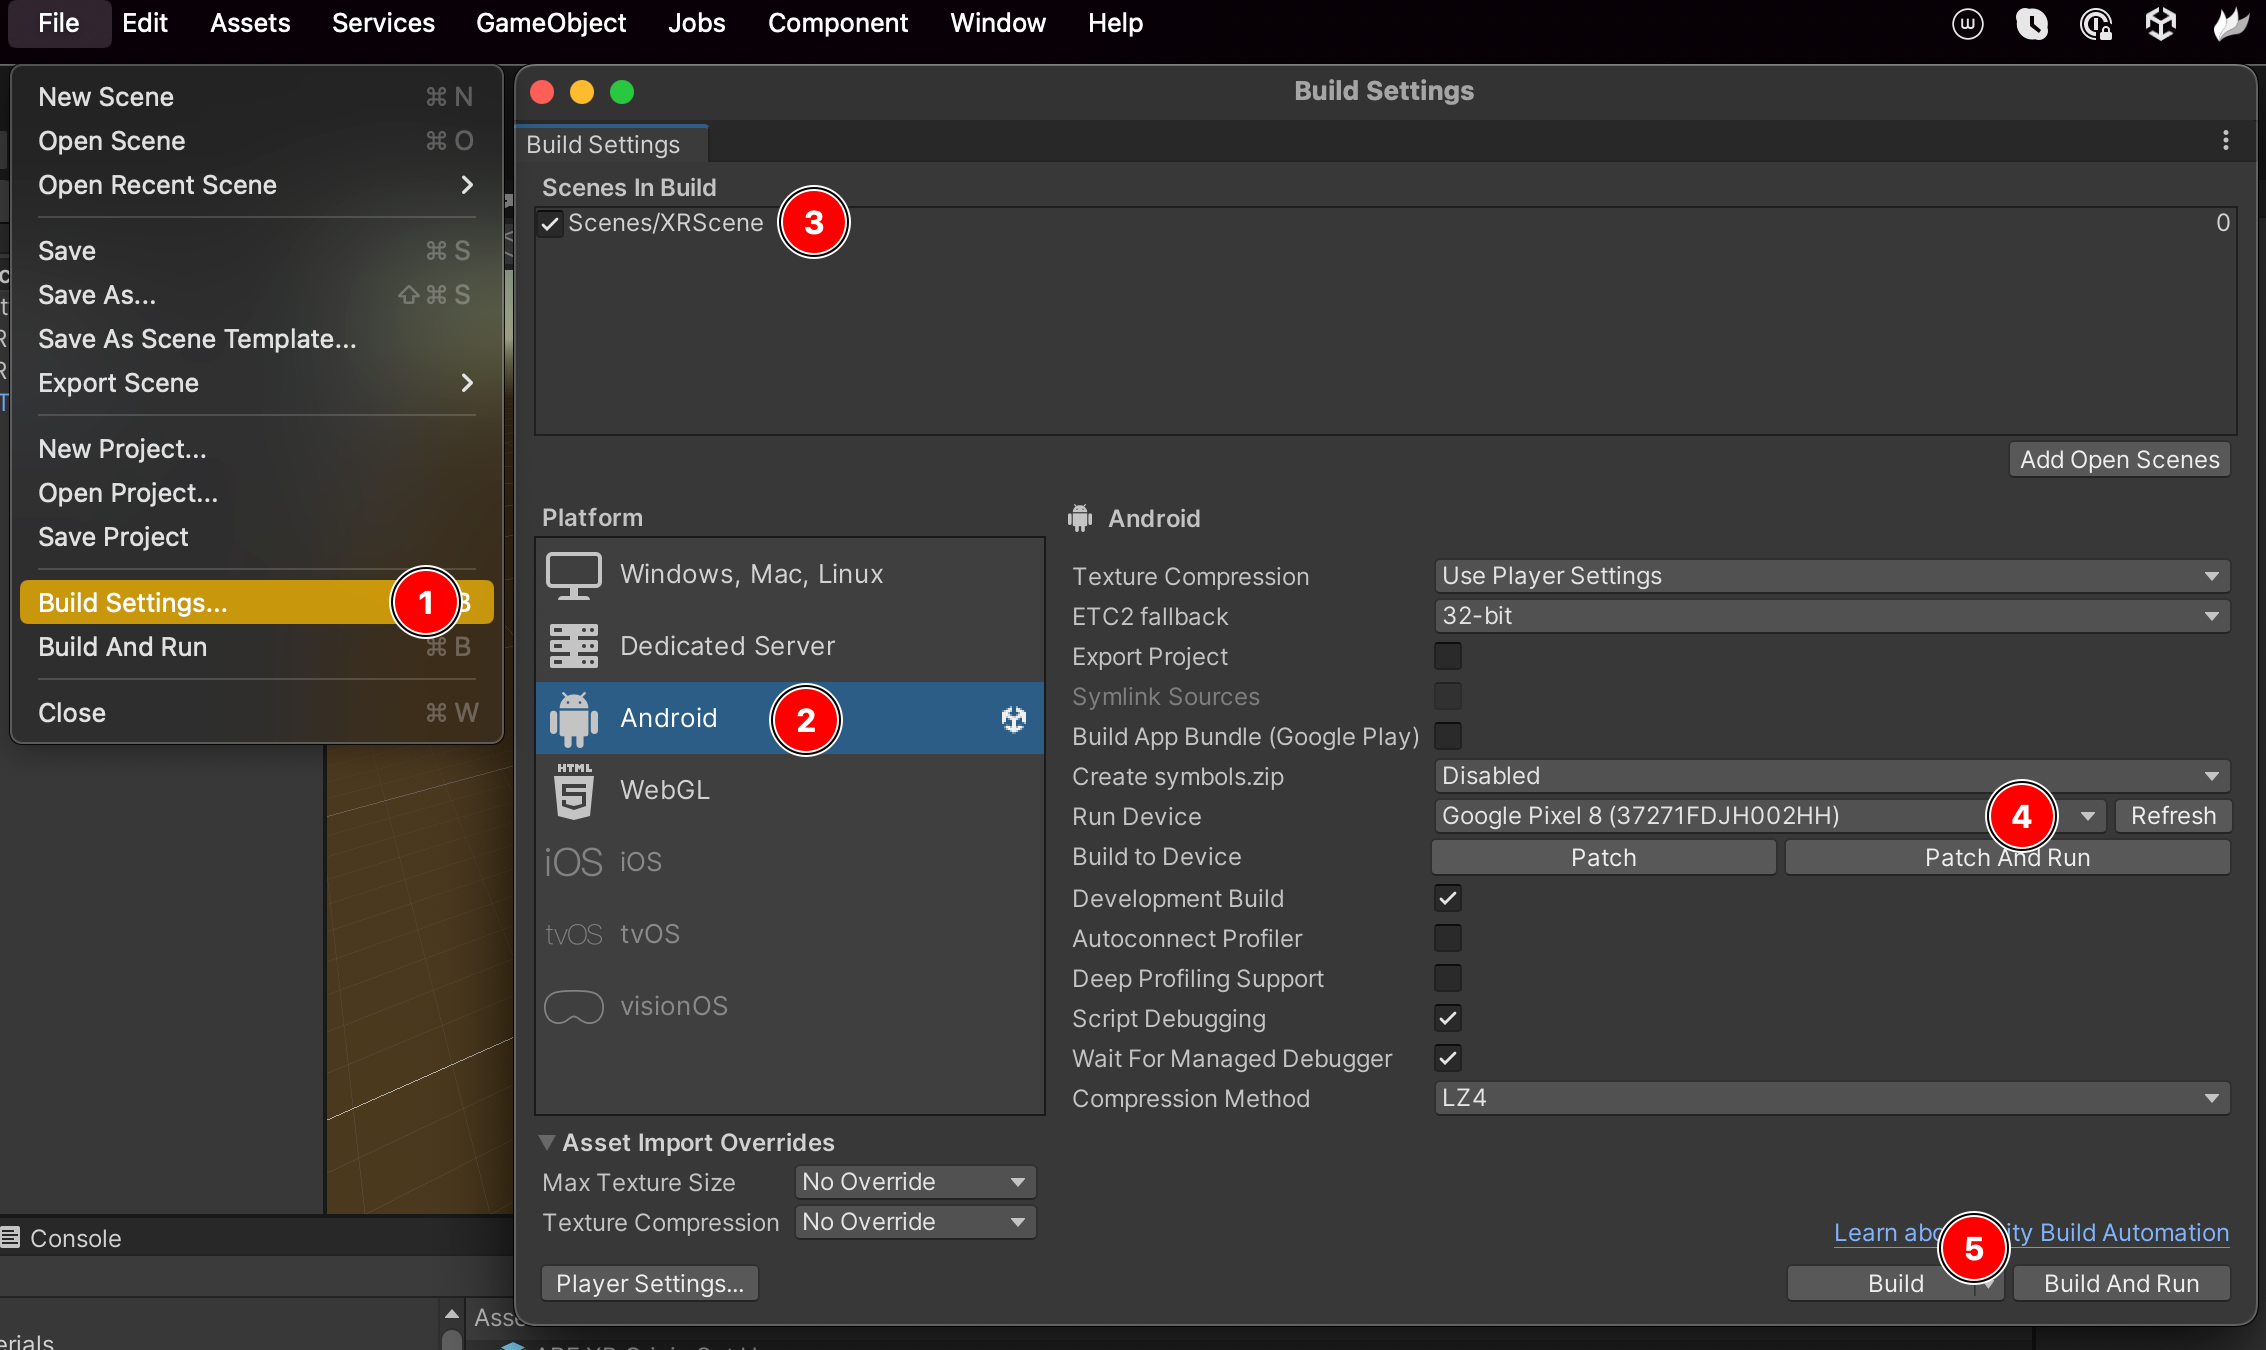
Then in the Unity Editor:
- Locate the
File > Build Settingsmenu - Make sure that Android is the selected platform, Switch Platform if needed
- Ensure that
XRSceneis the default scene. - Select the device on which the application will be installed.
- Hit
Build and Runto compile the project and install it on the mobile device
Step 4: Configure the XR player sample application
Configure the application after it has been installed (Step 3): the content is pushed into the application's private storage (Android/data/com.fivegmag.rtxrplayer/...), which is created when the app is first installed. If a push fails because the directory does not exist, install the application first and then push the content.
Clone the rt-xr-content repository. This requires git LFS to be installed on your system.
git clone https://github.com/5G-MAG/rt-xr-content.git
Push glTF content to the smartphone:
cd rt-xr-content
adb push ./awards /storage/emulated/0/Android/data/com.fivegmag.rtxrplayer/files/awards
Create a file named 'Paths' listing glTF documents to be exposed in the player, one per line. The Android player reads this file at startup to build the menu of scenes offered to the user:
/storage/emulated/0/Android/data/com.fivegmag.rtxrplayer/files/awards/awards.gltf
/storage/emulated/0/Android/data/com.fivegmag.rtxrplayer/files/awards/awards_floor_anchoring.gltf
Upload the 'Paths' file to the Android device:
adb push ./Paths /storage/emulated/0/Android/data/com.fivegmag.rtxrplayer/files/Paths
Step 5: Launch the player
Locate and launch the player.
Expected result: at startup the player reads the 'Paths' file and shows a menu listing the configured scenes; selecting a scene loads and renders it.
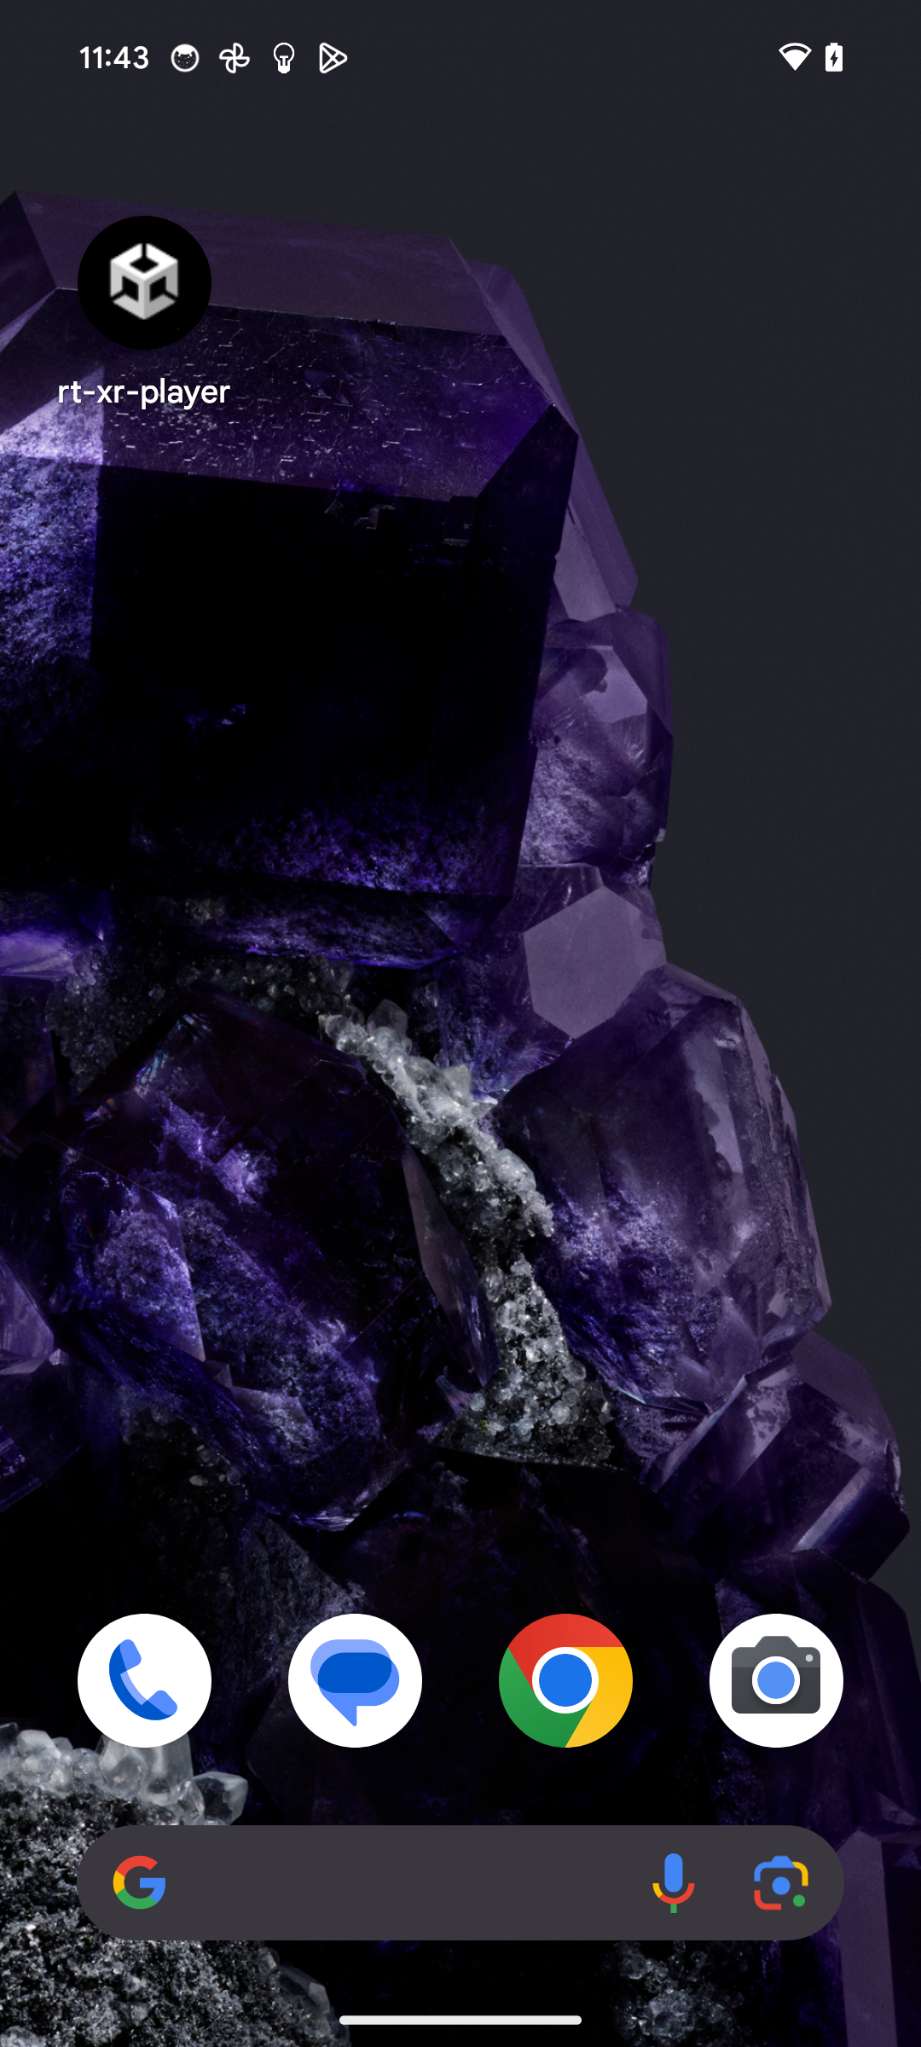
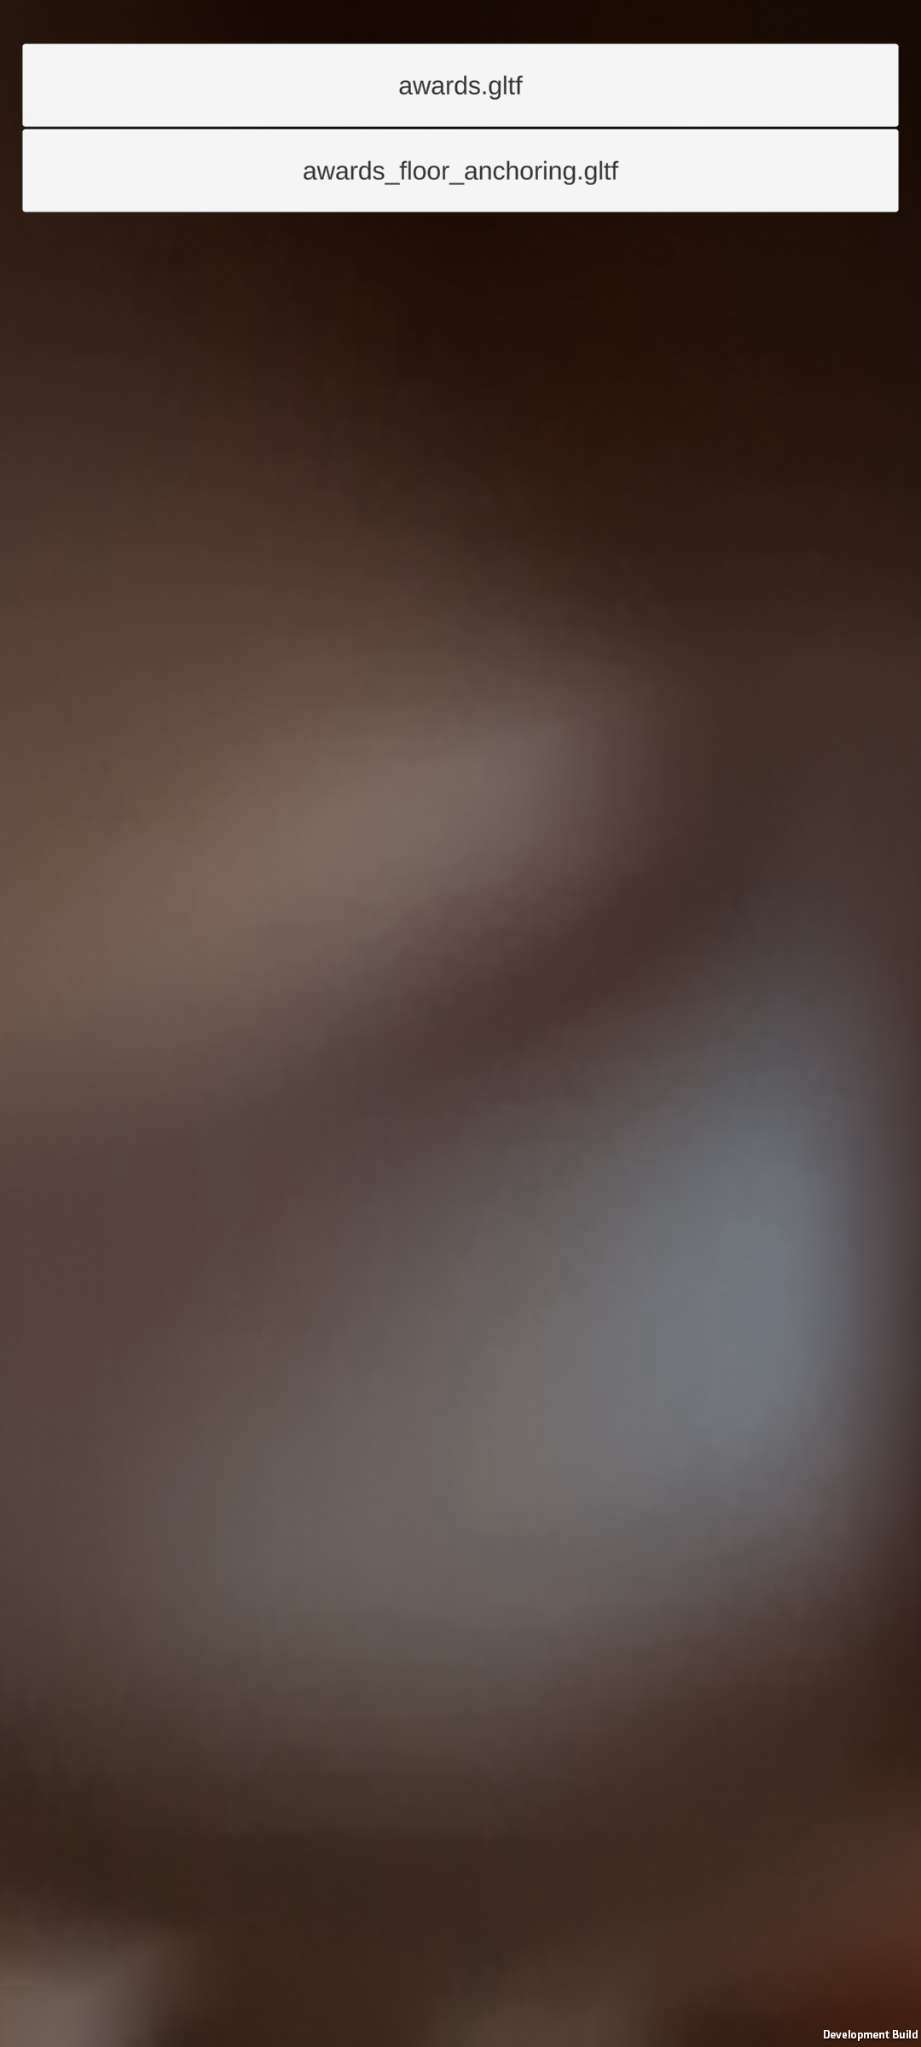
Figure: the XR player app icon (left) and the startup scene-selection menu built from the Paths file (right).
Next steps
- Try authoring your own content: Creation of MPEG-I Scene Description Test Assets.
- Explore the sharing use cases: Immersive and 3D Media message.
- Return to the Tutorials index.